The will walk you through the process of creating or adding an account that was already created.
The first section of this page will walk you through the process of creating a new account. If you wish to add an already existing account click here.
To create a new account
1. From within Treasury Software click on File > New Account > Create an account.
Note: In order to create a new account you will need to have admin rights to your SQL Server.
Then select New Account.
.gif)
2. Select "Create an account + ADD it to your catalog" and select Next.
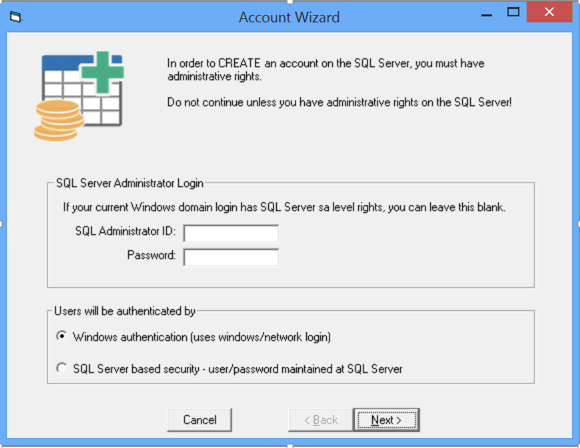
3. Choose your authentication then click on Next.

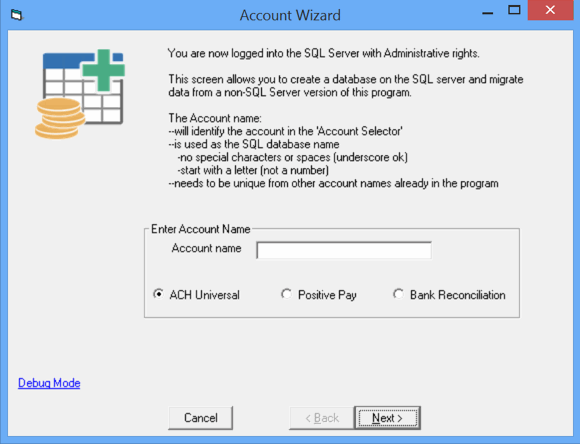
4. Give the account a name and click Next. This name is just for internal purposes -- the name you give it will not be on the actual file.
Tip: You may want to assign a name that identifies the originating bank account.

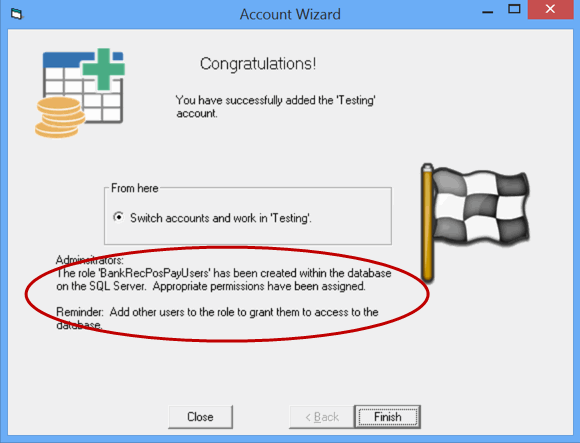
5. Congratulations as you are now finished creating the account.
Note. You will now need to grant permissions through SQL Server Management Studio for anyone needing to access this account. This only needs to be done when creating new accounts.
Please click here to go to our support page that will walk you through the process of doing this.

Note: To toggle between accounts, select File from the top left and you will see all your accounts listed under Recent Accounts. Click on the account name in the white space and the software will take you to that account.
.gif)
.gif)
Congratulations, you can stop here as you have now successfully added an account and can navigate between all your accounts.
Grant Permissions
As a reminder, you will need to grant permissions to all individuals who need to access this account. This is only done when creating new accounts.
Please click here for the instructions on how to do this. Note, you will only need to perform the first step.
.gif)
________________________________________________________________________________________________________________
To add an existing account:
1. From within Treasury Software click on File > New Account > Add an existing account.
.gif)
2. Next select "Add an existing account to your catalog".
.gif)
3. Choose your authentication then click Next.
.gif)
4. Next select the account(s) you would like to add. If you want to add more than one account, you can hold the CNTRL key and click on the different accounts to add and they will all be included.
Click Next
.gif)
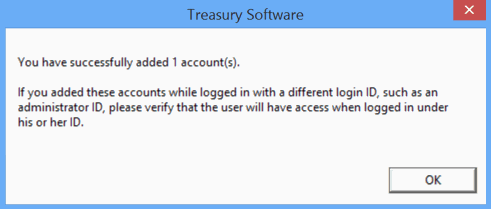
You should receive a similar message.

5. Click OK.
.gif)
Congratulations, you are now done.
Note: To toggle between accounts, select File from the top left and you will see all your accounts listed under Recent Accounts.
.gif)
Now you can select any account under Recent Accounts. Click on the account name in the white space that you wish to work in and the software will place you into that account.
.gif)


