ACH Setup - Turn 'On' Multiple Origination Accounts feature (only available in Advanced (Processor) edition)
Setup
From the Settings tab select ACH Setup and proceed to the 6th screen.
In the Third-Party Service Providers and Fiduciaries box, select either "On-The-Fly" or "Profile-based".

If an Offset Record is needed, return to screen 4 of 7 of the ACH Set Up and enter the Offset ABA/Routing Number/Account Number/Company Name for one of your Origination Accounts.
Then click "Finish"
Remember: Your bank will let you know if they require an Offset Record. If they have not indicated that they do, DO NOT FILL OUT that section of Screen 6 of 7. Simply Complete the Wizard and save.
Mapping the 'Origination Account' field in the Transaction Import Wizard
Start the Transaction Import Wizard. Select a file to import and continue until you arrive at the Mapping Screen.
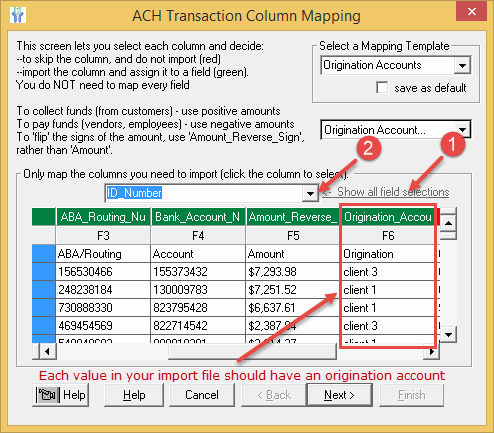
Map the field with the lookup values as 'Origination_Account'. Tip - Click the 'Show all field selections' link.

Complete the Import Wizard as usual to save the mappings.
Confirmation.
Now, create the ACH file as you normally would
Go To Create ACH File Page > Create ACH File.
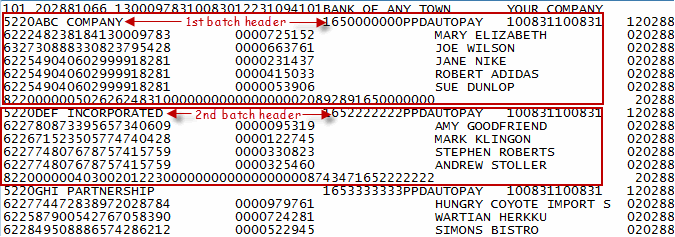
Your ACH file should have characteristics similar to the file below.
Each batch header contains the information regarding its origination account.

Importing Multiple Origination Accounts
Rather than adding Multiple Origination Accounts one at a time, you can import a file with this information.
Prepare a file
Create an Excel or a comma delimited (CSV) that contains as much information as possible (below).

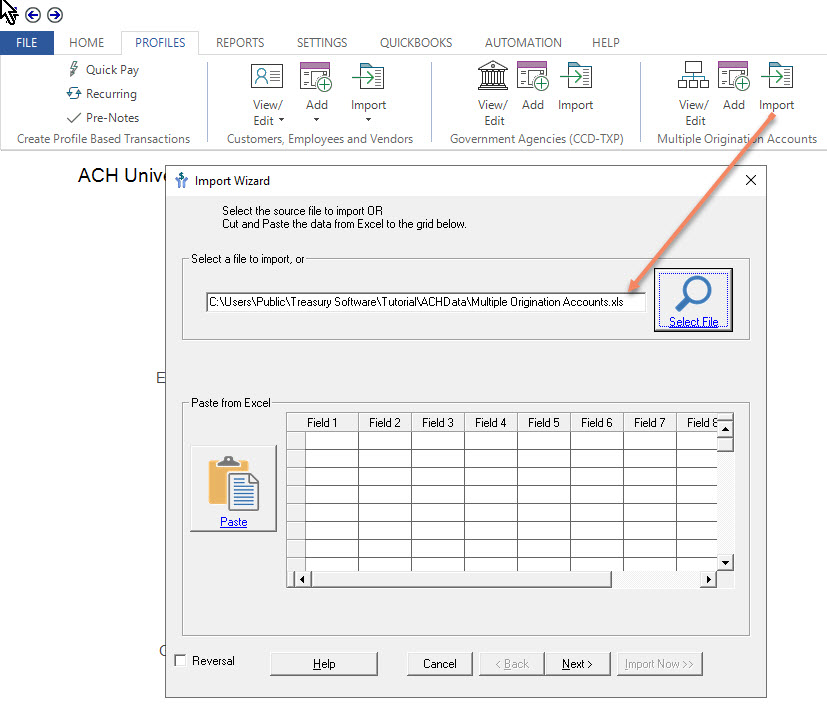
Start the Multiple Origination Account Import Wizard
From the Profiles tab select Import.

Follow the Import Wizard prompts.
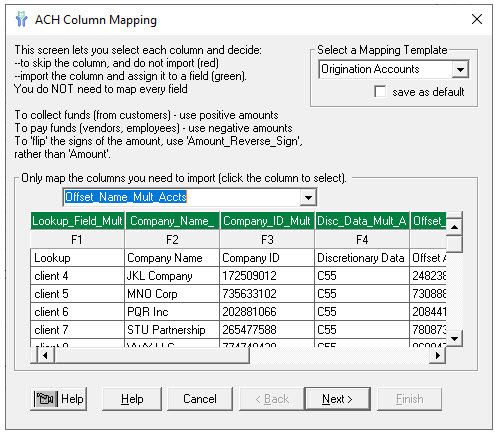
At the Mapping screen, map your fields, using the screen shot below as a template.
Reminder: You may not have all the fields shown below. That is okay.

Complete the Wizard as prompted.


