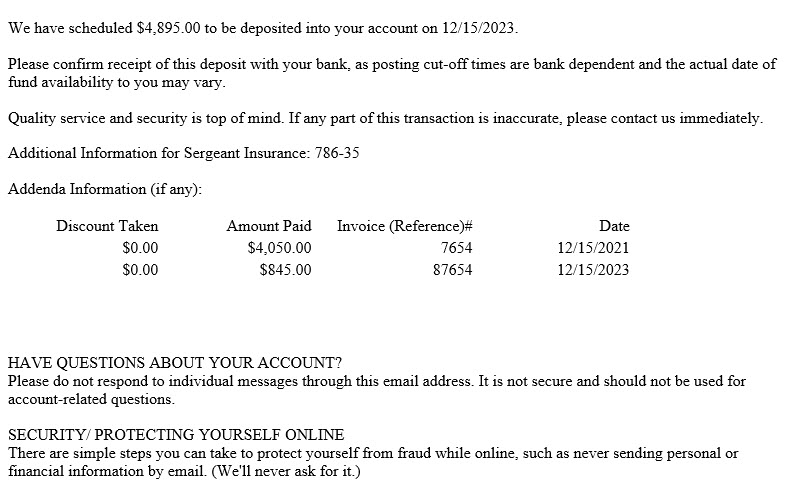
ACH Universal enables you to notify your customers, employees and vendors of ACH transactions.
--Each email only contains information regarding their transaction and the email template (body) can be fully configured by you.
--You do not need everyone's email to use this feature
For example, if you are collecting funds from your customers, but only a percentage have provided you with their email address, that's okay.
ACH Universal will send out emails for the transactions with an email address, and simply skip the others.
--Includes check stub information
If consolidating your records, or using QuickBooks, easily include one consolidated email to each customer, employee or vendor. [NOTE: QuickBooks Online does not allow the consolidation of transactions in email.]
--Send by Outlook, any SMTP server, or our hosted email
Setting Up Email Notifications
From the Home tab select Email > Email Setup.

Welcome screen
The Welcome screen covers basic concepts and reminds users that they will need ACH Universal Corporate or Advanced (Processor) level editions.
Check the box to activate the feature and click 'Next'.
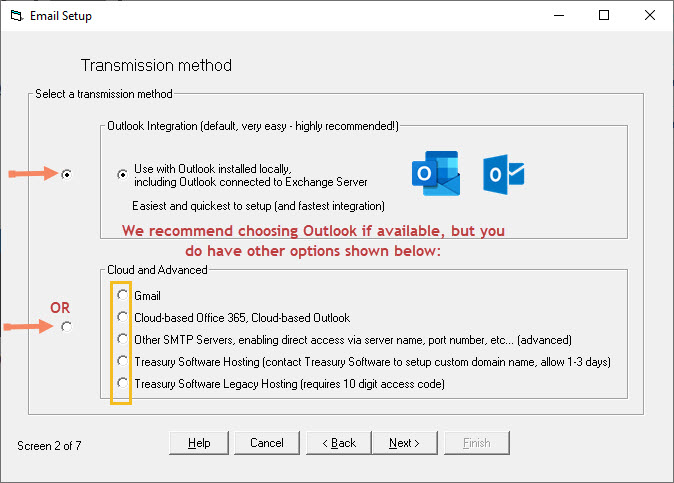
At this screen you have various choices:
--Outlook Integration
--Advanced setup
This page follows the instructions for Outlook. See the next page for the Advanced setup.
Note: If you have Outlook (or Outlook/Exchange)--always select the Outlook option.
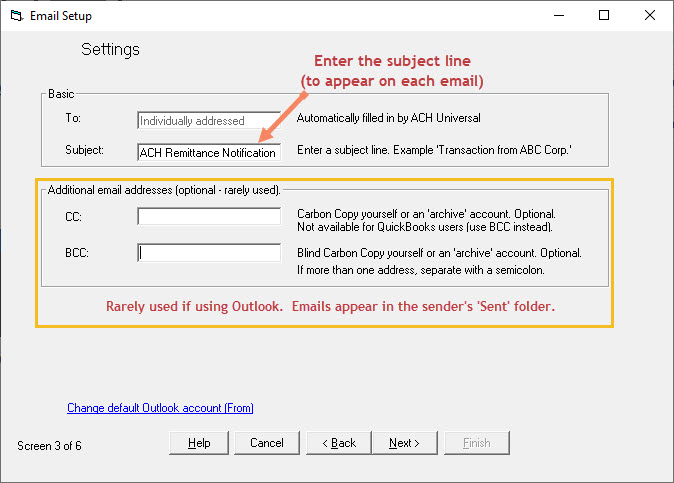
Settings - Subject line and cc/bcc
Enter the subject line.
If another user needs to be cc'ed or bcc'ed, enter it now.
Notes:
--If you cc yourself, you will 'spam' yourself. Remember, the email will be in your Outlook 'Sent' mail folder.
--The 'From' address will always be your default Outlook profile.
Email body (template)
Here you can fully customize the email message/body.
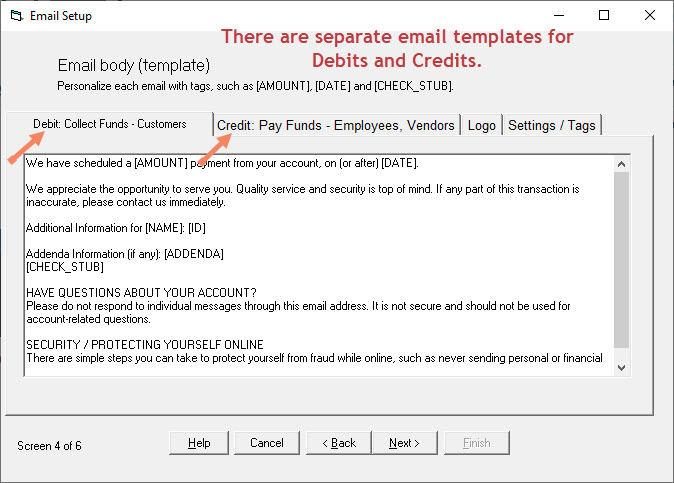
There are different templates--one for debits (collections) and one for credits (payments out).
Information on this tab will be used for notification regarding all debit or credit transactions. A basic notification email is provided by default. You may customize the email as you see fit by editing directly in the window. Click the Credit tab to modify settings for credit notifications.
Please note the tags below (capitalized and within brackets) - such as [DATE], [AMOUNT], etc.
These tags merge data from the transaction into the email body. This list of tags available is in the 'Settings/Tags' tab.
Note: The Memo tag holds the information for QuickBooks vendor 'stub' information.
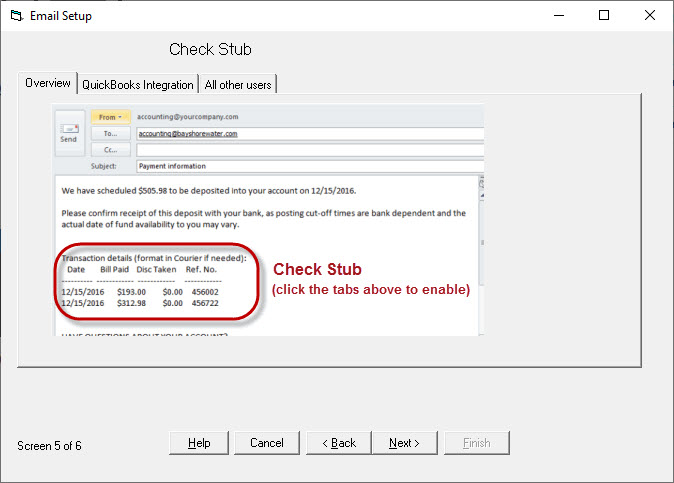
After pressing 'Next' you will be on the Check Stub screen, which shows you how the email will look when consolidating bill payments.
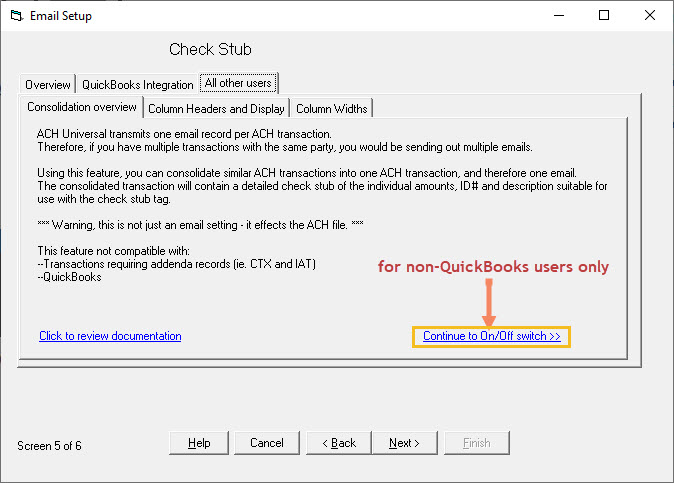
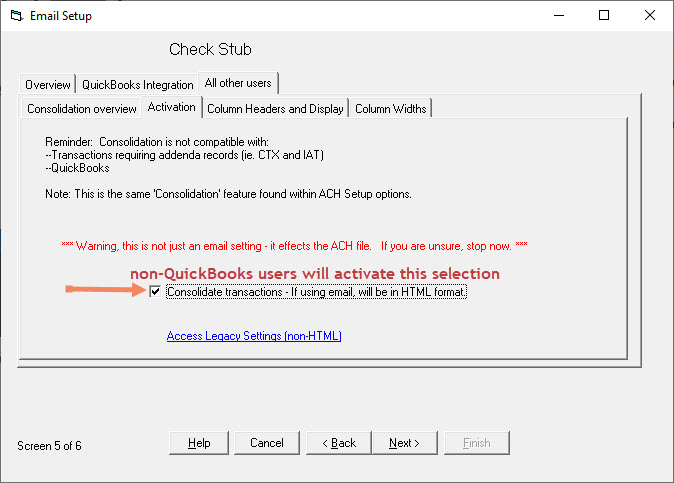
QuickBooks users will not need to do anything in the setup to use the consolidation feature. However, if you not a QuickBooks user, and are importing from an Excel or CSV file, click on the 'All Other Users' tab and here you can consolidate ACH transactions into one ACH transaction so that only one email goes out.
The final screen gives you the option of transmitting emails automatically by selecting the 'Automatically... ' checkbox. These emails will be transmitted on a workstation level when you exit ACH Universal. If you choose to send 'Manually', you can trigger the email from the Home tab by selecting Email > Send.
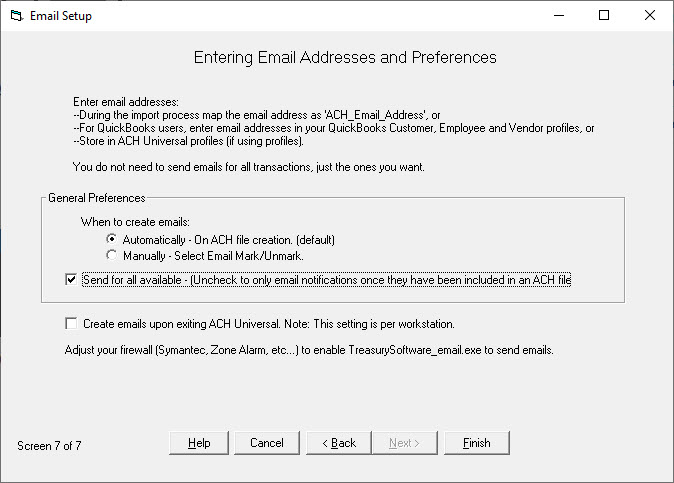
Click Finish to complete the email setup.
With the exception of the To: field (which is automatically filled in by ACH Universal), all fields will be used for each email notification.
|
CC |
Comma-separated list of email addresses to be copied. |
|
BCC |
Same as cc, except the notified party will be unaware of the copy. (Quickbooks users should always use bcc rather than cc.) |
|
Subject |
Provide a subject for the email. It should indicate the purpose of the email. For example, "Transaction pending by TL Supply" |
|
From Email: |
List the email addresses to be used as the reply-to email. The recipient can reply to this address. This address will be used to catch bounced emails. |
|
From Name: |
The name to use for the email. Recommended is to use your organization name or subgroup instead of a person. |
Cloud and Advanced Settings
For Gmail setup, refer to this article: https://help.treasurysoftware.com/hc/en-us/articles/360042879494-How-to-Set-Up-Email-Using-Gmail-v-2020-
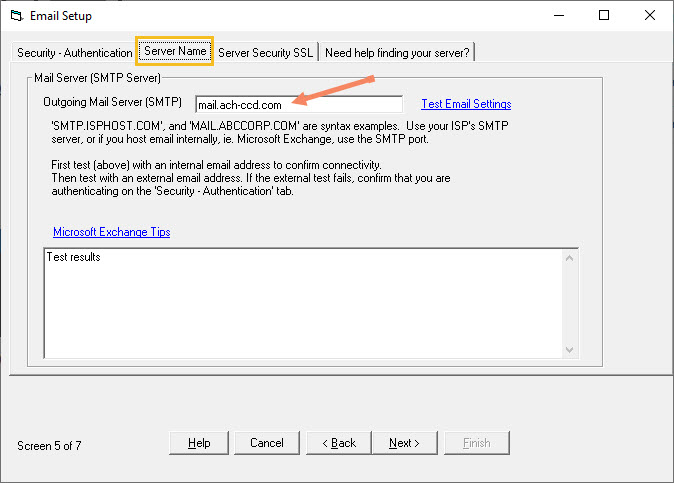
For Cloud-based Outlook (365) and SMTP servers, you will need settings that can be obtained from your email client or from your system administrator.
Exchange Server:
1. Configure these panels to connect to your SMTP port.
2. Initially test with an internal address (within your domain).
3. In the Exchange console setting under the Server Transport--choose the internal connector.
4. In the Exchange's Network tab, add the IP address of the computer that will be sending emails to the Exchange Server.
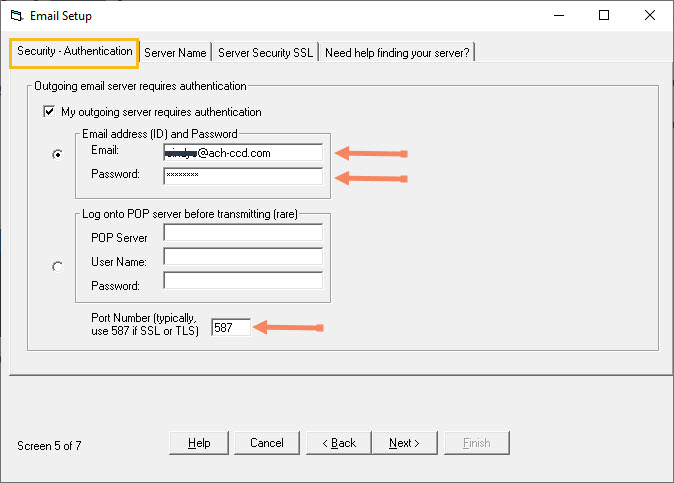
Security - Authentication panel
Enter your email credentials on the left side ('Outgoing email server requires authentication').
Make sure 'My outgoing server requires authentication' is checked, and your User Name and Password are correct.
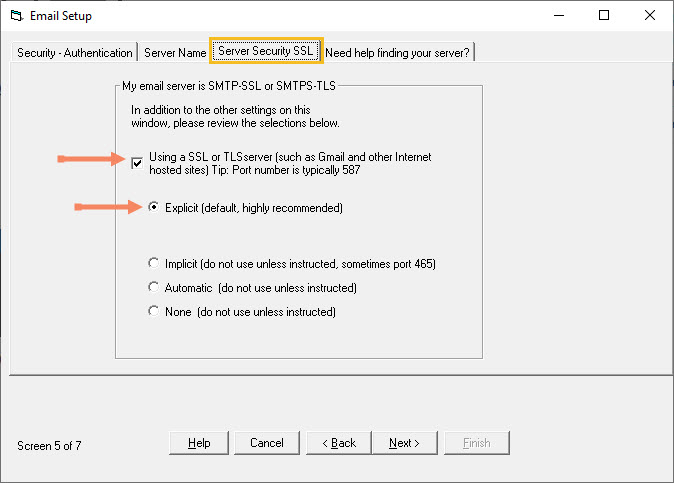
If your SMTP server is configured with either SSL or TLS (Gmail), then check the box and leave 'explicit' as your initial setting.
When all settings are entered, go back to the Server Name tab and click Test Email Setting. Enter your email address. If your settings are correct, you will receive a system-generated test message. If your settings are not correct, ACH Universal will display a message.
When everything is correct, click 'Next' until 'Finished'.
Troubleshooting
Can't get an email out?
1. Check that your anti-virus software is not blocking you.
Norton Anti-virus and other packages may quarantine the file 'TreasurySoftware_email.exe'
when it attempts to send out emails. Make sure that you add this file to your 'white' list.
2. Confirm that there are no firewalls, such as Microsoft Windows Firewall, that could be blocking the transmission.
3. If using Exchange server, make sure that you have proper permissions, and that your computer IP address has been added to the sender's list.


