Thank you for choosing Bank Positive Pay!

When you start the software, you'll arrive at the Welcome New User Screen - click Bank Positive Pay.
Note: If you haven't already installed the software, please download and install the software .

Create a new account
You will want to create a new account. Click on File>New Account

Then, "Create"

In the software, you can set up several accounts (databases)--one for each bank account or entity. To flip back and forth between accounts, you'll click on the blue 'File' tab, and then click on the account showing in the white space.
Note: Desktop and Workgroup (SQL Express) users will be able to create an account, however Enterprise (SQL Server) users may need permission/assistance from their IT department.
NOTE: If you would like to setup using SQL Express or SQL Server to share a centralized database, the workstation (client) will need to 'migrate' to the SQL backend before an account is created.

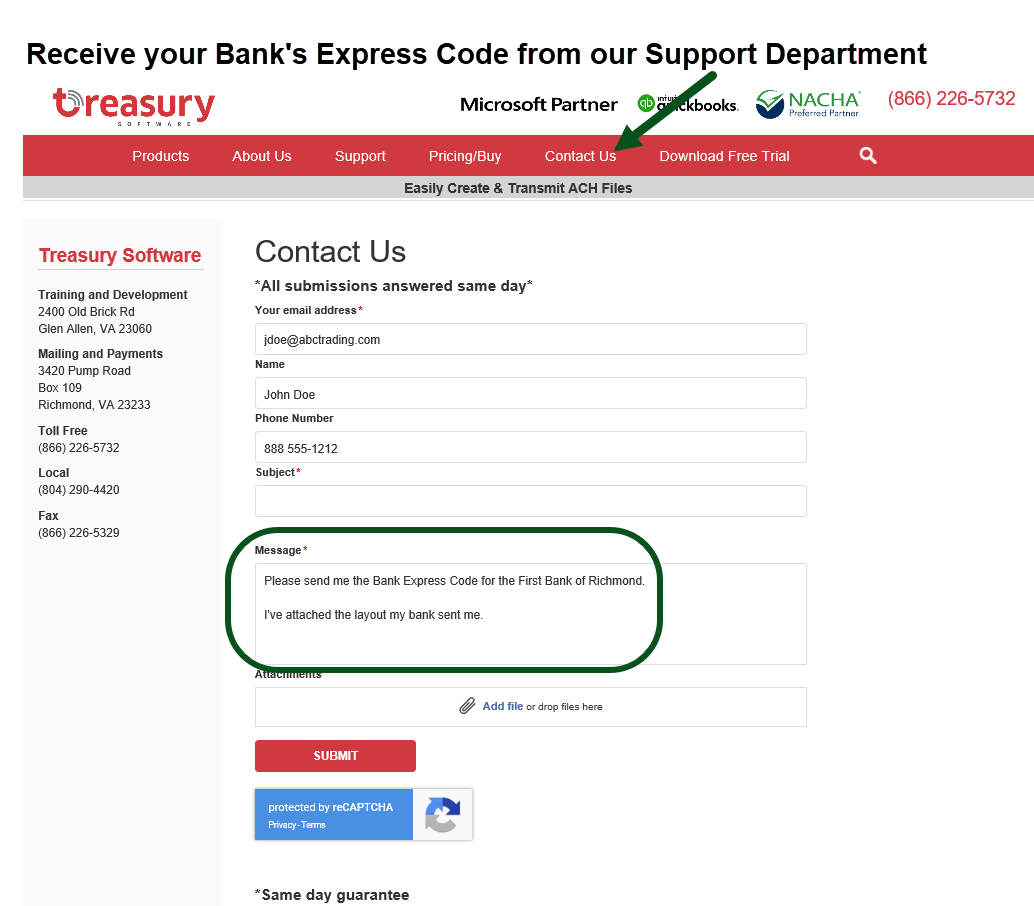
Request your Bank's Express Code by contacting our support department
What is a Bank Express Code?
Treasury Software has a library of over 300 positive pay layouts for banks across the U.S. and Canada.
Each layout has a number - a Bank Express Code - that enables you to quickly and easily format your positive pay file in accordance with your bank's specifications.
As many banks have more than one layout/format, we ask that you send us the format information you received from your bank.
Entering your Bank Express Code
Once you've received your Bank Express Code from Treasury Software Support, you may enter it into the software by clicking on Setup. Then enter the code into the "Bank Code" field and click Update Bank Information.

Importing and transmitting your Outstanding Check list (or approximation)
Before you start sending your issued checks on a regular basis to your bank - we recommend that you create a list of all of your outstanding checks. This will minimize your exceptions at the bank (and also minimize your bank fees, as many banks charge per exception).
What if we don't keep an Outstanding check list?
Simply use a check register that lists all issued/cut checks for the past 30 days. This should cover most checks outstanding.
If you've exported the list to Excel or a csv file, follow the same instructions below for importing Excel and csv files.
If you're using QuickBooks or QuickBooks online and want to go back 30 days - follow the instructions below - and when selecting the 'FROM' date, select a date at least 30 days in the past.
Importing Data - Your cut/issued checks
Scroll down to your section:
QuickBooks
QuickBooks Online
Excel, csv file, accounting packages and legacy systems
QuickBooks - Importing Data
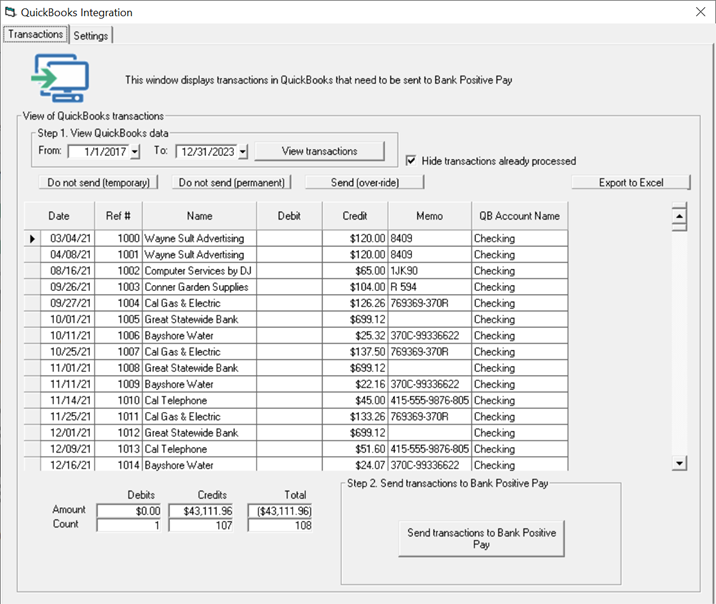
Our QuickBooks Integration window enables you to select the account you want to work with.
Once set up, you'll access the Integration Window to select checks (all by default) and create the file.
If you are a QuickBooks user, please refer to this link: QuickBooks
QuickBooks Online - Importing Data
Our QuickBooks Online Integration window enables you to select the account you want to work with.
Once set up, you'll access the Integration Window to select transactions and create the file.

If you are a QuickBooks Online user, please refer to this link: QuickBooks Online
Excel, csv files, accounting programs and legacy systems - Importing Data
Create an Excel or csv file with your check data.
Typically, this would be your check register from your accounting package.
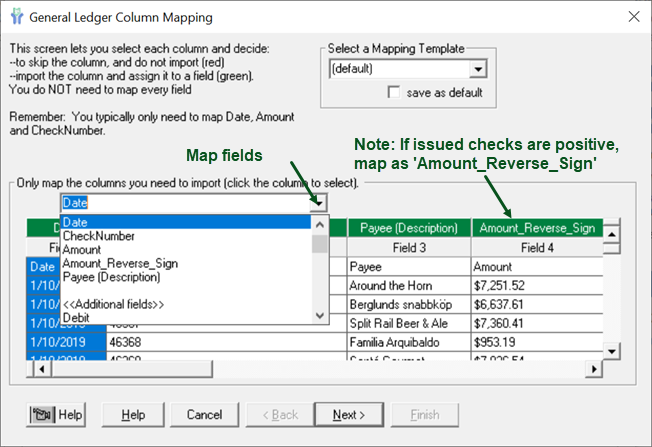
Note: All banks require the amount and check number fields - and most also require the payee name and date fields as well.

Import the file and map the file from our Home Page - Excel Import Transactions Wizard.


If you are an Excel, csv file user, please refer to this link: Excel, csv file import
Step-by-step checklists:
Citrix/Terminal Services installation
Please contact us if you require assistance.


