Thank you for choosing Bank Rec.
For those who prefer to watch videos to 'Get Started', please use these links:
Getting Started - Part 1 (4m 55s)
Getting Started - Part 2 (4m 57s)
Getting Started - Part 3 (3m 55s)
When you start the software, you'll arrive at the Welcome New User Screen - click Bank Rec.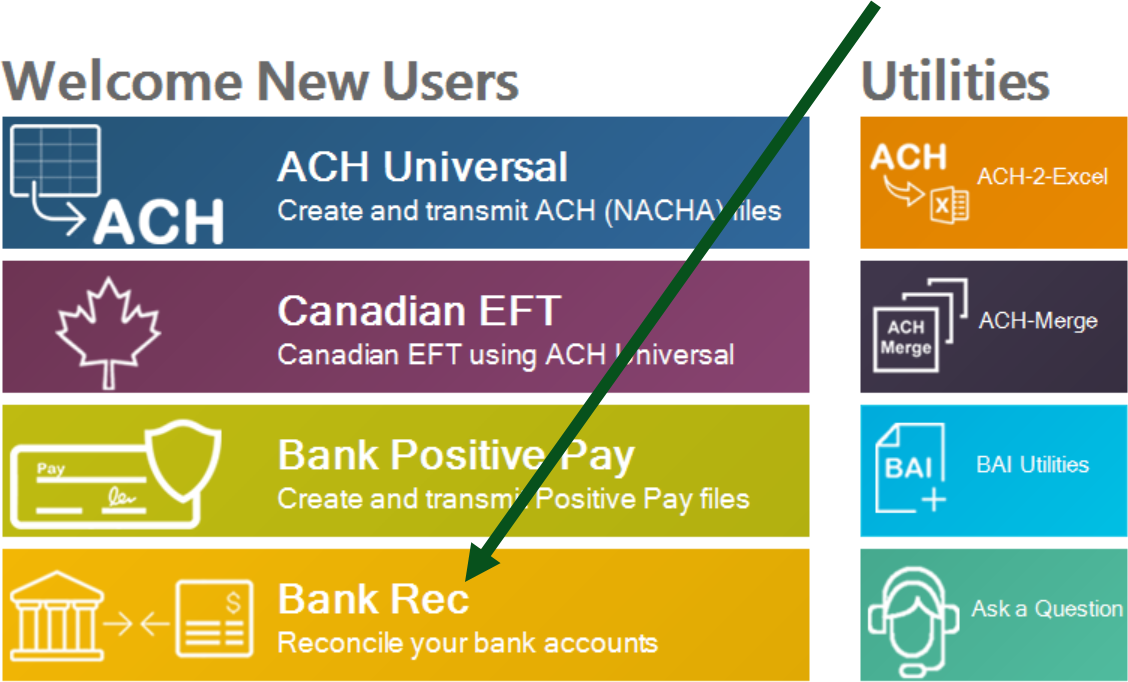
Note: If you haven't already installed the software, please download and install the software .


In the software, you can set up several accounts (databases), one for each bank account you are working with. To flip back and forth between accounts, you'll click on the blue 'File' tab, and then click on the account showing in the white space.
Note: Workgroup (SQL Express) users will be able to create an account, however Enterprise (SQL Server) users may need permission/assistance from their IT department.
NOTE: If you would like to setup using SQL Express or SQL Server to share a centralized database, the workstation (client) will need to 'migrate' to the SQL backend before an account is created.
Preparing Bank and General Ledger Data for Import
1. First decide on the month (period) that you want to first reconcile.
For this example, let's say it's March 2021.
2. From your accounting or other internal system - export all transactions for March 2021. Typically, this would be your check register from your accounting package. Save the data in Excel, comma delimited (csv) or tab delimited format.
3. Go to your bank's website and download and save the data for the March 2021. Save the data in Excel, comma delimited (csv) or tab delimited format.
4. Optional: Locate an Outstanding Check list for the period ending February 28, 2021 (the period ending just before your first period in Bank Rec). If you haven't been performing bank reconciliations and don't have an outstanding check list - don't worry.
An outstanding check list would only be used for this first period's reconciliation. For future reconciliations, all unmatched items automatically 'roll-over', so no outstanding check lists would be used.
Note: This example covers Excel and csv file imports. If you are importing your General Ledger in a different manner, click on the appropriate link: SQL Insertion (advanced), QuickBooks or QuickBooks Online.
Importing Data from Excel and csv files
I. General Ledger Data
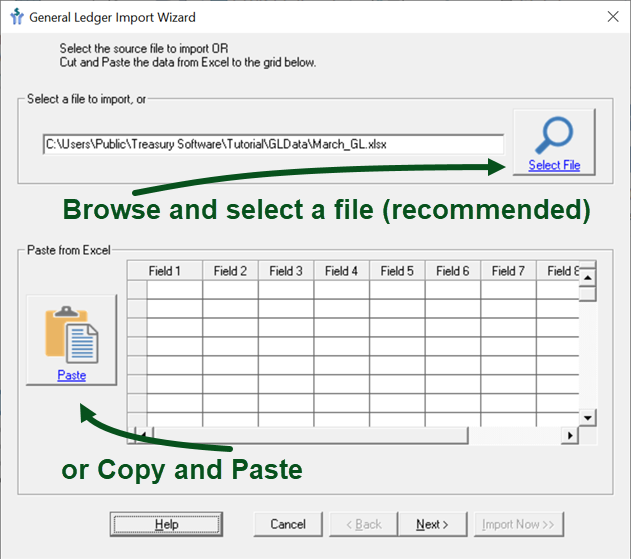
We'll start with importing the General Ledger data, click on the Import G/L icon.
In the wizard, you can either:
•Browse to a saved file by clicking the folder icon
•Copy data from Excel or other program and paste it into the grid a the bottom of the screen.
Note: It is best practice to import a saved file.
Map the fields that you want to import on this screen
Highlight the field you want to map for import and then select from the drop down the name of the field.
Initially all columns will be 'red' (not imported). It is okay to leave unused fields as 'red' (not imported).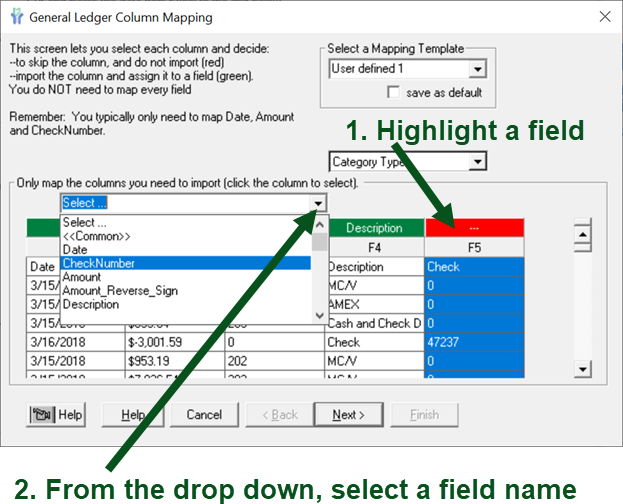
What fields to I need to map?
Typically:
-Date
-an Amount field, such as 'Amount', or both 'Debit' and 'Credit fields, both 'Amount' and 'Sign', or 'Amount_Reverse_Sign'.
-Description
-Check Number
Additional available fields include:
-those used in the automated matching process including: Site, and Text1 (a.k.a. Matching Field),
-additional Text and memo fields for research/reporting.
Review Records screen - confirm control totals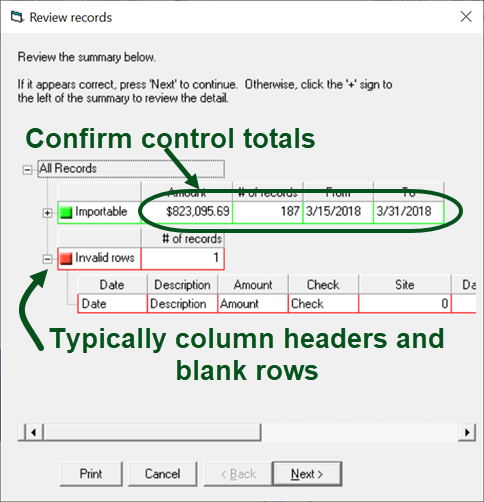
Note: The Invalid Rows section will list all rows that will not be imported into Bank Rec.
The software will automatically mark header rows, footer rows, summation lines, and blank lines as invalid. For each row that is invalid, a check mark will be placed in the appropriate column indicating why the row was invalid.
Once you have verified the importable information is accurate, click Next. If you wish to Cancel the import process and try again, simply hit Cancel.
Click Finish to complete the General Ledger Import Wizard.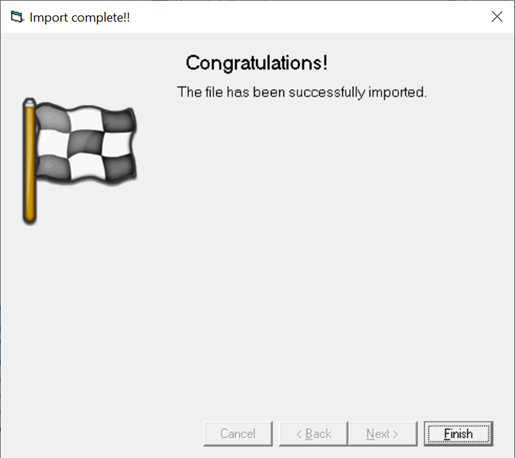
II. Bank Data
Click the Import Bank icon to start the Import Bank Wizard.

The Import Bank Wizard works in a manner identical to the Import G/L Wizard. Refer to the above instructions as needed.
III. Outstanding Check list (optional - if available)
If an Outstanding Check List is available, use it. Even if it may be not your best work, use it.
Note: If the Outstanding Check List is on a separate schedule, you can import more than one file to the G/L.
Use the Import G/L Wizard to import your list.
Import your Outstanding Check List in a similar manner to the above imports.
Tip:
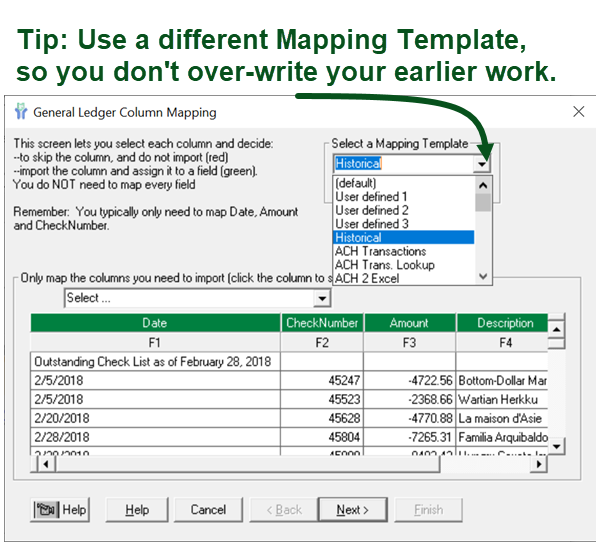
As the Outstanding Check List will probably have a different layout than your G/L data (check register), when you map the fields in the Mapping Window (below), change the template so that you don't over-write your earlier work.
Setup - Automated Transaction Matching (high speed matching)
Now the fun part - high speed matching.
If you're using the system for a typical payroll or disbursement account, you can most likely leave the default rules and start the matching process (see below).
If the account is a depository account - or you have complex matching requirements, you'll want to adjust the default settings.
Click the 'Matching Rules' icon to display basic matching rules to display.
You can turn on/off the rules as needed. For now, let's leave them alone and close without saving.

IV. Run - Automated Transaction Matching (high speed matching) and Review Your Records.
To Run Automated Transaction Matching, simply click on the Matching icon.

The system will re-run the Automated Transaction Matching when you click on the Matching icon if you've imported additional records since the last time you ran matching.
Tip:
If you make changes to your matching rules and want to re-run the matching process - or if you want to simply re-run the matching process for any reason, click on the "Run System Matching" icon on the Ribbon Bar.

After you've reviewed records for possible manual matching, click on the Unmatched Records Report to run reports and export to Excel.
This report satisfies the requirements for most of our clients.
However, if you'd like to continue and perform a full Bank Reconciliation select Reports > Reconciliation report.
V. Update your Matching Rules to increase your matching percentage.
Click on the Matching Rules icon to display options


