This will walk you through the process of creating a new account and--if needed--adding an existing account.
To create a new account
( click here to skip down to adding an existing account)
1. From within Treasury Software click on File > New Account > Create an account.
2. Next select "Create an account + ADD it to your catalog" and select Next.
3. Next give it a name and click Next. This name is just for internal purposes--the name you give it will not be on the actual file.
Tip: You may want to assign a name that identifies the originating bank account.
4. Select Finish as you are now done creating the file.
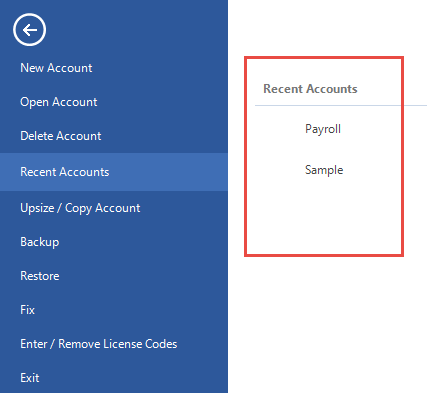
Note: to toggle between accounts, select File from the top left and you will see all of your accounts listed under Recent Accounts. Click on the account name in the white space and the software will take you to that account.

.gif)
Lastly, do not forget to setup your backups.
Congratulations, you can stop here as you have now successfully added an account and can navigate between all your accounts.
.gif)
____________________________________________________________________________________________________
To add an existing account:
1. Get a copy of the account (the .brd database file) that you want to add and 'paste' that file in your computer in the same place it was found. It will vary depending on the operating system you are using.
The file will usually be in C:\Users\Public\Treasury Software\Data
Note: If you have been using QuickBooks Online integration, the .brd file will be found under
C:\Users\[User's folder\Documents\Treasury Software\Data
2. From within Treasury Software click on File > New Account > Add an existing account.
.gif)
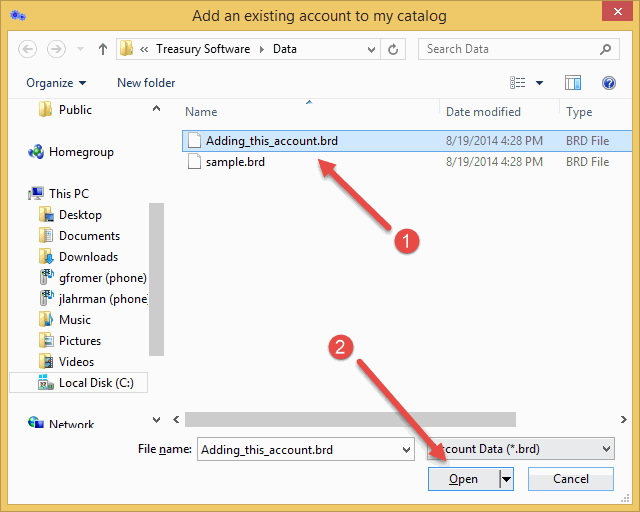
3. Click Next and select the account (the .brd file) you wish to add, then click Open. The cursor will spin for a moment.

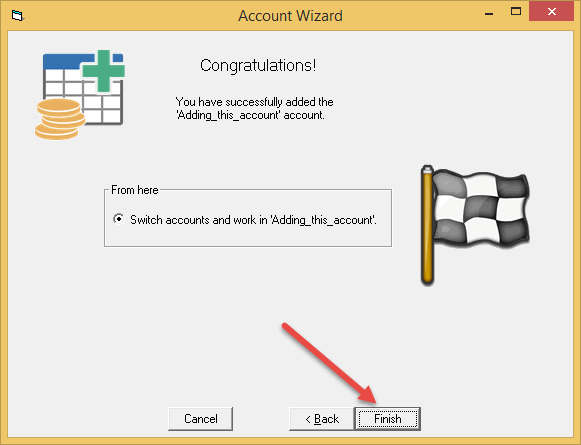
4. Click Finish -- then close/reopen the software.

Note. To toggle between the different accounts, select File from the top left and you will see all your accounts listed under Recent Accounts. Click on the account name in the white space that you wish to work in and the software will place you into that account.

Congratulations as you have now successfully added a new account.


