This is a legacy feature and is no longer supported.
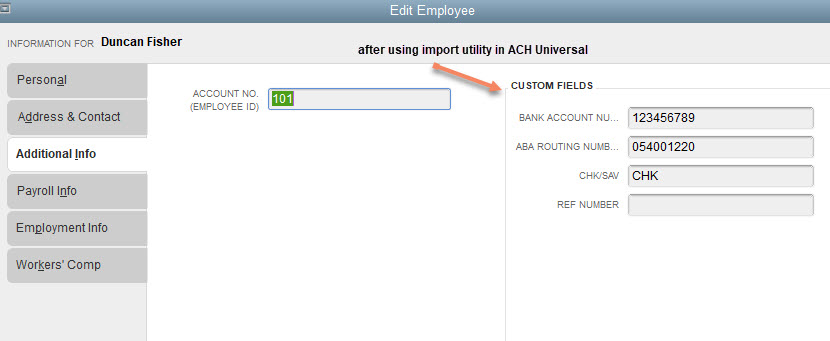
When ACH Universal integrates with QuickBooks for the first time, three custom fields are created on the profiles under the 'Additional Information' tab (for vendors, employees, and/or customers), and those fields will contain the banking information: Bank Account Number, ABA Routing Number, and CHK/SAV. It is then necessary to record the banking information in those new custom fields on each profile so ACH Universal can find the info and create a 'NACHA' file.
If you are working with a large group of employees, vendors, or customers (over 100, for instance), the task of updating QuickBooks profiles manually, one at a time, is daunting.
You do have the option of importing/uploading the bank data to QuickBooks using a utility in ACH Universal.
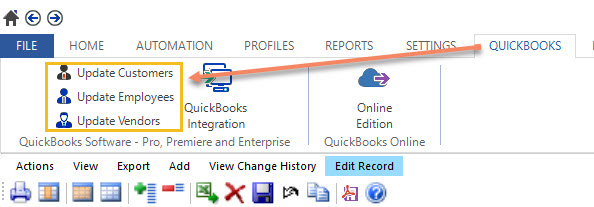
[NOTE: You cannot add new profiles to Outlook using this utility; you can only update the profiles that are already set up in QuickBooks.]
INSTRUCTIONS:
1. When logged in as an Admin and in single user mode in QuickBooks, go through ACH Universal's initial QuickBooks Integration wizard so the new custom fields are created on the profiles (under the Additional Information tab).
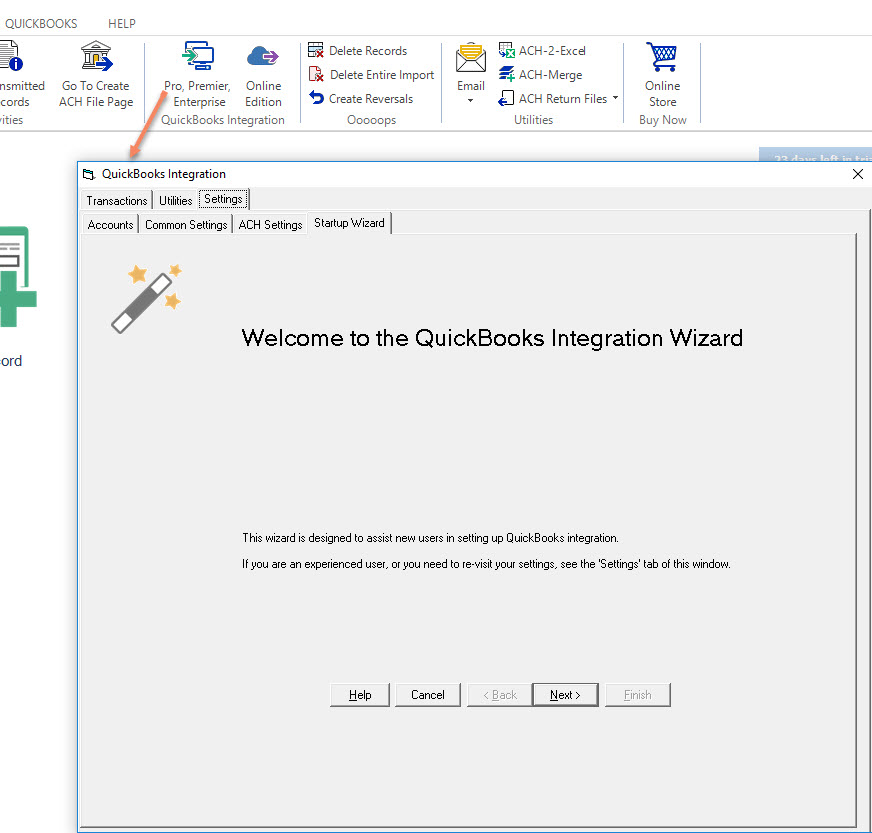
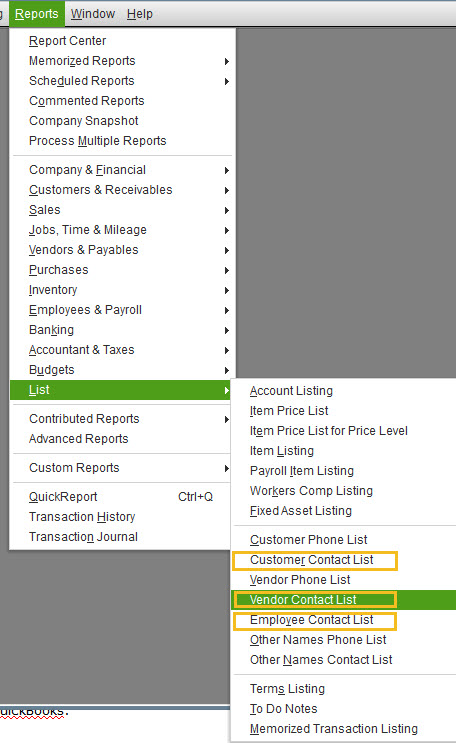
2. Run a report in QuickBooks through the List option--Customer Contact List, Vendor Contact List, or Employee Contact List.
Then, click on "Customize Report". Under the 'Display' tab, place check marks next to the three new fields so they will appear as columns on the report.
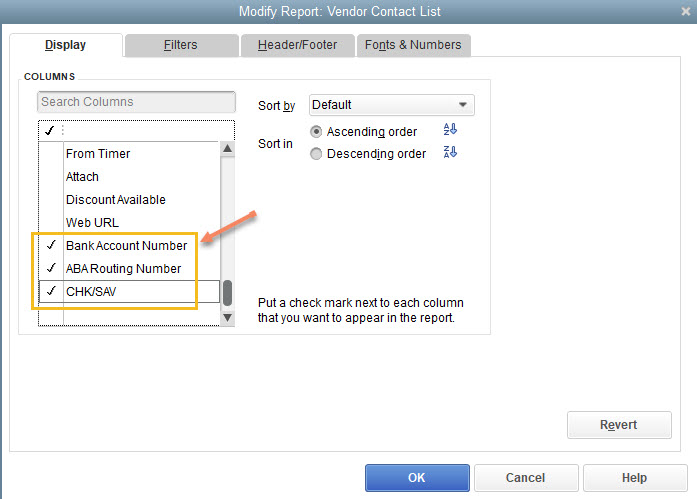
3. Export the report to Excel. (There may be additional columns of data that are not needed, but it is not necessary to delete the extra columns.)

4. Fill in the banking data on the Excel sheet for all profiles--Bank Account Number, ABA Routing Number, and CHK/SAV. Be sure to 'Save as' and name the file so you can locate the spreadsheet again.
5. Next, in ACH Universal, you will click on the QuickBooks tab, and click on one of the 'Update' utilities.

This will bring up the Import Wizard.
6. Import your Excel file and continue to the column mapping. You will only need to map the columns on the Name, Bank Account Number, ABA Routing Number, and CHK/SAV (selecting the proper heading so they turn green). All columns showing red column headers will be disregarded.
[NOTE: This is a different import wizard than the transaction imports on the main, Home screen.]
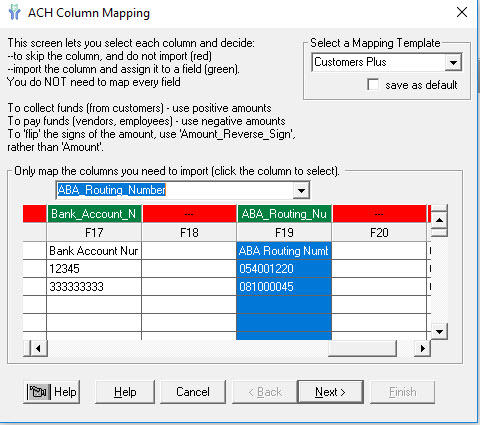
Continue clicking 'Next' until 'Finished'.
At this point, the bank info has been uploaded to your QuickBooks profiles.
NOTE: After the Excel sheet is imported to ACH Universal, it is recommended that the spreadsheet be password protected as it contains sensitive banking information.


