When a QuickBooks user has both checks and ACH payments to process, there are a few ways to identify the two groups to be paid.
1. You can set up a separate Accounts Payable specifically for ACH transactions, so you'll have an A/P-Checks and A/P-ACH, and you'll enter bills to the appropriate A/P account.
2. Or, if there are no other third party applications feeding into QuickBooks, you can mark the vendor/customer name with a hyphen (or other symbol) at the end of the name so they are easily identified in the 'Bill Pay' window when they appear in QuickBooks.
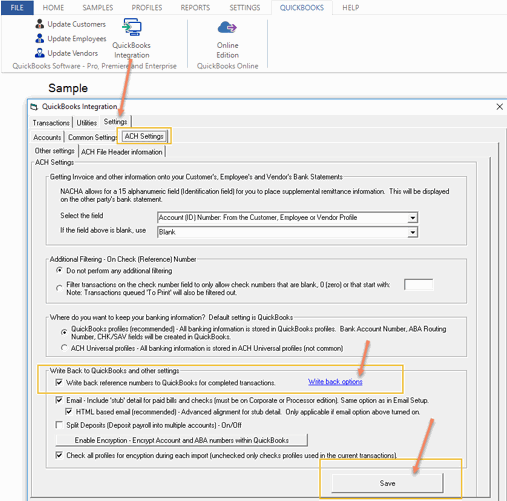
3. If you are using a current version of ACH Universal, turn on the QuickBooks ‘Write Back’ feature (by clicking on the QuickBooks Integration icon > Settings tab > ACH Settings. At the bottom of the page, check the box and be sure to click on the blue link for ‘Write back options’. This will allow you to set the ACH sequence numbers that appear in the QuickBooks bank register.

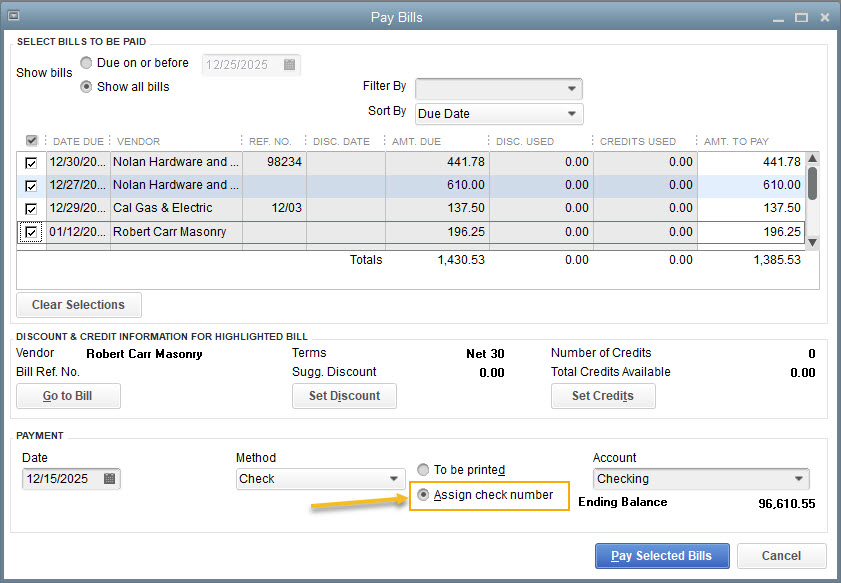
- When paying bills in QuickBooks, and you are just paying the ACH vendors, mark to 'Assign the check number' and leave it blank. (The write-back feature will fill in the number in the register.)
- If you are paying bills for both check vendors and ACH vendors together at the same time, mark 'to be Printed'.
Integrate with QuickBooks and create an ACH file. Only the vendors with banking information filled in on their QuickBooks profiles will come over to ACH Universal when integrating.
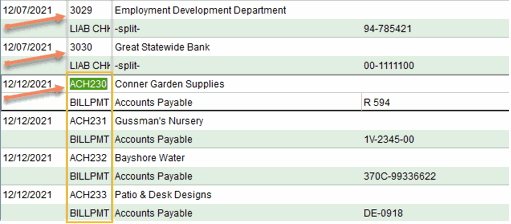
If you have selected the 'Write Back' feature, the QuickBooks bank register will be populated automatically with sequential ACH numbers. [Write back will not work with payroll transactions. Intuit locks these down.] After the ACH transactions are created, you can Print Checks for all remaining transactions that still say 'to Print'. The ACH payments will not appear in the list of bills to pay.

The resulting sequence in the bank register will reflect the ACH numbers and the check numbers.

NOTE: The Write-Back feature may not work in certain virtual environments.


